Tuesday, May 31, 2011

Summertime Drinks


Do you ever run into the problem where you buy an ingredient for a dish and then you never use it again? I try to avoid that and if something has an odd ingredient I’ll see if I can leave it out. Sometimes though, you can’t get away with it and you just have to get some random ingredient and hope you use it up in the dish.

We ran into this problem last year when Andy and I canned a Blackberry Framboise sauce. Framboise is (as I’m just realizing now) a raspberry brandy (also raspberry beer), as you can see from the picture, I purchased a raspberry liquor. At any rate, this liquor didn’t get drunk as I wasn’t sure what to do with it and beer is just easier.


Since Andy is storing our beer in our creepy basement, and I’m not fond of traipsing down there, I’ve been drinking more mixed drinks. Shuffling the raspberry liquor around finally got me figuring out what to do with it. Consulting the experts was the first step; however, I didn’t have campaign or some of the other essential ingredients. Improvising was in order! The end result is quite tasty, with a refreshing lift of raspberry and a beautiful maroon shade that fades darker toward the bottom.

The Ingredients:

1 shot vodka
1 ½ shots raspberry liquor (or perhaps another fruity liquor?)
3 ice cubes (I’m a stickler for this)
1 can “citrus soda”

The Process:

Put your ice cubes in the glass. Pour over vodka, then liquor. Top glass off with soda and stir together. Enjoy! (Responsibly please, I’m not to be blamed for raspberry overindulgence)

Sunday, May 15, 2011

First Salad from our Garden

A few weeks ago we harvested our first salad from our garden. With the warmer weather our lettuce actually did better. Since lettuce is a cold weather crop, I didn't think it'd like the 80 degree days, but it was better than days in the 60s. Since the first salad we've harvested another salad, including spinach, radishes and green onions. We have a tough, clay soil. So I think the radishes didn't grow big because the soil was dense, or maybe since our trees have leafed out it's too shady for them.

It's incredibly satisfying to pull food from the garden and enjoy it right away. My dastardly cat Buster discovered that he loves green onions, possibly more than we do. As I was carefully weighing the harvest (to keep track of yields) Buster jumped on the counter and absconded with a green onion. Since green onion leaves are like strings, he was just as excited to bat at the onion as I pulled it away as he was to chew the end. Who thought a cat would like onion?


At any rate, we did get some good radishes harvested and more are one the way. Andy ordered a mortar and pestle online and it's been in frequent use since it arrived. This delicious radish butter was his first creation and used both the leaves and the bulbs of the radishes. The leaves are a bit prickly, so they do well with a bit of smashing.

If you're looking to try some radish butter yourself. All that is involved is a bit of soften butter (1-2 tablespoons), a couple of radishes (with their leaves), and some salt. Cut up the radishes and mash with the salt, once it's a bit creamy add some leaves. Gradually add leaves until they're all used up and everything is creamy. Add the butter, mash and mix thoroughly. Enjoy on toast, eggs, pasta or ice cream! (Just kidding on the ice cream bit) Since this isn't really a recipe as a jumping off point for improvisation, you can really adjust this butter to how you want. If you're not interested in using radish leaves, you could use fresh thyme, basil or parsley. Instead of butter this could be a mayo seasoning for burgers or sandwiches. There's a lot you can do with one simple idea!

The one plant going absolutely nuts in the garden are the potato plants. Andy planted four seed potatoes, and we can see already that we've got some potatoes grown! He built potato boxes around them, so they continue to grow up. I will have pictures of that later. The potatoes have impressed me with their massive growth, and I'm pretty excited to harvest them.


Sunday, May 8, 2011

We be Jamming


Nothing says spring has arrived better than fresh strawberries! Yesterday Andy and I, and our friend Allie ventured north to pick strawberries at Bottom View Farm. It was super fun plucking my own berries and seeing my basket fill up. The last time I picked berries I think I was about the same size as the blueberry bush and ate more berries than I collected. This time around all the berries made it to the basket. With our fresh berries Andy wanted to make 2 batches of strawberry jam. Our poor judge of quantities and fuzzy memory of the amount needed led us to pick and purchase roughly 2 gallons of strawberries. It wasn’t as expensive as I thought it would be, and we weren’t daunted by our gigantic leaking bag of berries.

When I was looking up strawberry canning options the “old fashioned” strawberry jam caught my eye (this is Antique Modernism after all). Old fashioned just means that the jam is made without pectin and utilizes the fruit’s natural pectin. This sounded appealing to me so we attempted this as our first batch. After about an hour we realized that “old fashioned” actually meant boil the crap out of it until you can’t stand it any more, then fill jars and process as usual. From the way things look in the jar it has set nicely and our patience lasted just long enough. The book claimed that this jam caramelizes more and has a different taste than pectin-made jams. It certainly turned out a beautiful deep burgundy color.

Just keep boiling, and boiling, and boiling...

It ends up turning this scrumptious color!

Next up, Strawberry Sauce. I was doubtful about the utility of this one since we don’t put a lot of flavored sauces on things. However, Andy said it sounded delicious and we brainstormed other uses for strawberry sauce. It could be made into to frosting, muffins, tarts, perhaps even a layer in a cake. So strawberry sauce could be versatile. The recipe called for using corn syrup and our corn syrup has high fructose corn syrup, which isn’t something I want to use in my cooking, so I swapped it for honey. I wasn’t sure how it was done, but it turns our you can swap honey for corn syrup one for one. In addition to honey there was apple juice, orange juice and zest. This one was very fragrant with the honey and orange scents. I’m excited to try some leftovers over some pie later this evening.

Strawberry sauce is a brighter red.

Last we made strawberry jam with pectin. Andy concluded that powdered pectin was a worthwhile invention as this jam took only about 20 minutes to make. I’m glad we made both kinds, so that we could learn what it spoon tests were all about and learn to fully appreciate powdered pectin. This was the batch where we finally remembered to let the jars sit in the canner for 5 minutes after processing. So, hopefully the lack of sitting doesn’t affect the jam and sauce too much. I’m feeling confident though that it’ll turn out okay.

Right to left: Jam with pectin, jam without pectin (old fashioned), and sauce.

If you didn’t think that 3 batches of jam/sauce was enough to use up 2 gallons of strawberries you’d be wrong! We had enough berries left over to fill a cookie sheet for freezing. These little guys will be used for smoothies and... well, probably nothing else since smoothies are awesome.


I’m jazzed about the success of our first canning adventure of the season. We came out with 20 jars of jam/sauce and only 1 serious jam burn. On our list for other canning adventures include tomatoes, tomato sauce, pickles, peaches, blackberries, and applesauce. This is a good start; however, 3 batches in one day is a lot of canning activity and we were both dog tired after the kitchen got cleaned up.

Our new dog Cotton! He's tired from jamming too much.

Friday, May 6, 2011

Brewing is not Just for Men!

Sorry for the slow posts this week. Here's an short video from Minnesota Public Radio about the increasing number of women home brewing. Since I'm a woman and I home brew I'm pretty excited about more women getting into brewing, and for that matter, drinking beer. Here's to the ladies!

Thursday, April 28, 2011

Calzones!

I don't have a "finished" calzone picture because I was hungry. Please admire my raw calzone.

Recently Andy discovered an early British show with Jamie Oliver on Netflix, Oliver’s Twist. We both love Jamie Oliver and support his food revolution. We also have one of his cookbooks but have yet to see one of his TV shows, so we were intrigued. In two of the shows we watched Jamie made calzones (pronounce the word “calzo-neighs” and you’ll be in the British spirit of the program), both a sweet and a savory.

Watching this got us hankering for calzones, especially since we’ve never made them before and so it became a bit of a challenge. After making the calzones a couple nights later we realized that they’re just pizzas folded over and cooked a bit longer. There’s really nothing to calzone making. For all those calzone novices and pizza experts, you are just 3 simple steps away from making a delicious dinner (or lunch).

Andy's ingredients. Our small plates were a bit too big for one calzone.

Making pizza dough is super easy, even more so if you have a stand mixer to knead the dough for you (or an overactive child who likes to mush things). Andy usually makes the dough and he uses a recipe from Cooking for Dads, which is a website I highly recommend; though I’m sure Jamie Oliver has a recipe too that you could use, since we’re making these calzones at his urging. You could get a pre-made dough if you don’t have time to do your own. Once you get your dough made, roll it out all at once and use a small plate (these are individual sized, unless you only have large plates) to cut out circles for the calzones. For pizzas I usually make them free form, but it’s good to have a symmetrical shape for calzones so that everything seals up evenly.

Load up your calzone like a pizza. Don’t worry about putting all the ingredients on one side, the dough should easily stretch over. We used tomato sauce, sauteed onions and peppers, olives, goat cheese and Parmesan. This is a good meal to use up leftovers, don’t be afraid to try new combinations and use up the odds and ends in your refrigerator. Alfredo sauce or pesto would be good sauce options. The typical pizza toppings such as sausage, pepperoni, you could try chicken or ground beef (maybe cheeseburger calzone?). Different cheeses would give your calzone unique tastes and are always fun to try. You could even take a cue from Mesa pizza and make mac and cheese calzones, but maybe it’s best to take things slowly. To seal up the calzone pull up one side and fold it over the other. To make sure it's really shut it helps to kind of roll up the edge, plus it looks pretty. Slash the top a few times with a knife to let steam out. And the calzone is ready to go into the oven at 400 degrees for about 10 minutes (or until you think it looks done).

My calzone, it looks a little pathetic after seeing Andy's, but it was scrumptious!

Extra calzones do fairly well refrigerated (after baking) and eaten the next day for lunch. Just make sure your lunch bag is big enough to handle it. If you want to show off for a crowd these are pretty simple meals to create for people in advance. Or you could have a DIY calzone party, which is always awesome. If you want to get really crazy, you can do like my friend Matt and make a Stromboli. Whatever you choose to do calzones are really easy and make a satisfying “gourmet” meal!

Monday, April 25, 2011

A Great Day is Brew Day


A completed and delicious maibock is best enjoyed in the great outdoors (or your backyard)

Brew Day is the best day of the week. With maybe the exception of the day you unseal and pour the first bottle of a new batch of beer. The very best day would be if these two days fell on the same day, but lets not get crazy.

Earlier I posted on how to bottle beer, which is only useful knowledge only if you have a nice batch of beer waiting to be bottled. So today’s post will be all about brew day and the steps to making your beer. If beer making seems complicated don’t despair. Allegedly if you can make tea you can make beer and (according to Craft Beer Talk) you’re pretty dim if you screw it up. As someone who has messed up 2 batches of beer, I am not an expert. But I’m not all that dim and I’ve learned from my mistakes. Hopefully that means I can help others avoid similar mistakes.

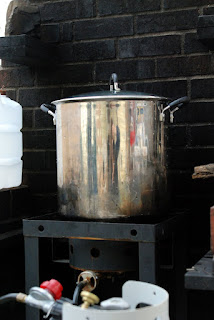
Get used to this view, you'll be seeing it for quite awhile on brew day

Step One: Assemble your Ingredients and Tools
This is important to make sure you have everything you need and don’t freak out halfway through the boil realizing that you don’t know what happened to the hops, or that your smack pack hasn’t been smacked yet, or the cauldron stir stick has been used to trellis the beans. While assembling your tools it’s important to sanitize everything. While you may be boiling the wort (pre-beer) and killing off bad guys in that situation, you don’t want to be sticking other contaminated things in your clean beer and leaving that to ferment for a few weeks. Though, don’t be a spaz about it, otherwise brew day looses it’s glory. Be sure to get a beer kit, or have some nice person at a brew supply store help you assemble a clone recipe.

Step Two: Start Boiling
Many kits and recipes have you start of by not-just-yet-boiling some specialty grains. This is usually your malted barley, wheat, roasted barley, oats and what have you. This is basically like making tea, warm up your water to between 150 - 170 degrees. Pour the specialty grains into the grain bag, tie a loose knot at the top and steep for 20-30 minutes. Quality of water is important here, we get two 2.5 gallon jugs from the grocery. Don’t use hose water, tap water or rain water. Next, bring your wort up to a boil now and while that’s working, take out the grain bag and let it just drip into the pot. Your grains are spent and you can feed that stuff to your horse, chickens or compost pile.

Specialty grain sack draining into the pot

Step Three: Hops, Malt and a Cold One
Depending on what kind of beer your making, you may need to add some hops at this point. Once the wort is good and boiling, add your liquid or dried malt extract (if you’re not awesome and have the capabilities to make an all-grain beer). Use your giant cauldron stick and stir in that goodness. Careful to not boil over, adjust your heat as necessary. Generally you’ll have to boil for about an hour, so this is the best time to, as my book tells me, “relax, don’t worry, and have a home brew.” If this is your first home brew, I recommend relaxing with a local craft brew. Keep an eye on your time if you need to add more hops, and give the wort a stir now and again.

Adding liquid malt extract to the mix

Step Four: Be Cool, Add Yeast, and Lock
Once you’re done boiling and all the grains, malts and hops are added to your wort, it’s time to cool it down and transfer to the sanitized primary fermentor. You can be super fancy get get a wort chiller. Or you can be like us and pull jugs of water from the freezer (did you remember to put those in before boiling?) and pour the cold water into the fermentor. Add your wort by siphoning, pouring, or using a funnel with a screen, just avoid adding the gunk at the bottom. Once the carboy isn’t warm to the touch (about 80 degrees) add the yeast. Stir it all up and seal with the airlock, we use vodka (or whiskey if we’re out of vodka). Keep the carboy in a cool dark place.

The hardest part is the waiting! But your beer will make it all worthwhile when it starts to bubble and foam. That’s the yeast working by eating all the sugars from the malt extract and grains. Those bubbles are helping make alcohol and are turning wort into beer. I can spend an embarrassing amount of time watching the beer bubble.

Transferring from a primary to a secondary is an activity best completed under observation

If you only need to do a primary fermentation, then you’re in luck! After a couple weeks (or longer if you’re patient) then you can bottle, which is awesome. Otherwise, get out your sanitizing gear again and clean out a secondary fermentor and siphon. Transfer beer from one fermentor to the other and you’ll have lovely clearer beer in a few weeks. While you’re waiting, if you don’t have a store of bottles built up, keep drinking! Or get some friends to donate brown, pop-top bottles to you.

Cheers!

Wednesday, April 20, 2011

The Simple and Complicated Life of Bread: Part I

When I tell people we make our own bread they usually respond with, “Do you have a bread machine?” (that’s if their first response isn’t “You can make bread?”). Depending on my level of snarkiness that day, my usual response is: No, I have a husband. Now, I know that not all husbands make bread, but I’m pretty sure all wives would be jazzed if their husbands did. To clarify, when I say we make our own bread, that truly means my husband, Andy, makes our bread. Despite the fact that Andy prefers to be the sole bread-maker, bread making has changed both our lives. Bread may have simple ingredients, but bring fresh loaves into your life and you may get complicated (and delicious!) results.

You may start with bread, but you'll end up making pizza dough...

Andy’s bread making began with the convergence of two books; Michael Pollan’s In Defense of Food and the larger-than-convenient Country Wisdom and Know-How. In Defense of Food provided the “why” of making your own bread, and Country Wisdom and Know-How presented the “how.” Andy and I both began reading labels more often at the grocery store, trying to purchase foods with the smallest ingredient list possible. We did really good at picking better foods and it was shocking to read about all the “food” we didn’t realize we were eating. One trouble spot was bread. The only bread I found with a short ingredient list cost $5 and wasn’t practical for a recent grad.

... or even spinach spaghetti!

Commercially made breads have ridiculously long ingredient lists, all to make one of the world’s most basic foods softer, whiter and sweeter. From Country Wisdom and Know-How we learned that bread is really simple (in addition to learning about how to build a rabbit hutch and weave baskets). It’s made of four basic ingredients: flour, yeast, water and salt. Andy wanted to make bread that would be inexpensive yet more nutritious than anything we could buy, so he set to work.

Andy is a tinkerer at heart and bread is an infinitely tinkerable food. This is a hobby that was destined to last. Since he started making bread he owned it. Bread is his territory, and I can be invited in, but it’s not my business. Though I am all about the taste testing. We began to buy bread less and less and with Andy’s first few loaves we realized that bread has taste, good taste, it’s not just a stale encasing for sandwich bits.

Not all bread needs to be loaf shaped, it can be braided, pretzled, or just smushed into an oblong form

To be honest, there were some bad aspects of the early breads. As with any new activity, things are not always going to turn out perfectly. A lot of my early sandwiches were held together by mustard and cheese slices, the bread was too crumbly. It took practice, patience and time. The bread was so delicious that I was fine picking it up in pieces from off the table to eat, instead of in the “traditional” slice form. We stopped buying bread altogether and would run into troubles when Andy was on bread making hiatus, we learned to live without.

Our revolutionary mixer and a honey whole wheat loaf resting.

One of the biggest breakthroughs with the bread came when we got married. A wedding gift from his parents was a KitchenAid mixer and it revolutionized our bread options. We had a garage sale bread maker at one point, but the loaves turned out large and cube-like and really didn’t improve the process that much. The mixer on the other hand was a fantastic addition. Recipes from Shirley Corriher’s Cookwise were put into rotation and delicious honey whole wheat and focaccia loaves made their way into our lives. We were eating better than ever and quite content. Andy tinkered with abandon on his recipes and I lunched on sandwiches that stayed together.

An option for a focaccia lunch, prosciutto wrapped asparagus, with dipping sauce, and of course beer.

Believe it or not there’s more to our bread lives! I’ll let you know all about the glories of stone ground flour and mayhaps share a recipe. Because it just wouldn’t be fair to talk about all this delicious food without sharing.